Saturday, June 11, 2011

Chocolate Walnut Brownies

I’m trying to remember if I have ever met anyone that didn’t like brownies. They were always a staple at our football tailgate parties (go LU Flames!) or potluck birthday bashes. It seems that almost everyone enjoys the tasty treat. There’s something comforting in their chewy, fudgy goodness. Unfortunately brownies usually come loaded with sugar and unhealthy fat. I wanted to share this recipe for an alternative to the not-so-healthy traditional recipe. This recipe produces a very pleasant tasting brownie – not too sweet, not too heavy. I’ve tested out some recipes using beans as a base for healthy brownies, but have yet to find one that gives me a brownie I actually enjoy. I’ve stuck with whole wheat flour for this recipe instead. You’ll thank me for it if you ever find yourself eating a bean-based brownie.


Adding walnuts to the recipe offers a flavorful crunch and also adds some extra nutrients. Walnuts are a really great source of plant-based protein. They are rich in B vitamins, fiber and antioxidants. Most diets aimed at lowering cholesterol levels promote eating walnuts, as their monounsaturated and polyunsaturated fats help to lower LDL and C-Reactive Protein levels (precursors for heart disease). Moderation is key though, as these nuts tend to be high in calories. Eating about 20 halves as a snack is usually a good balance.

Chocolate Walnut Brownies

¾ cup unsweetened baking chocolate (4 squares)
3/4 cup coconut sugar (or ½ cup Sucanat)
1/3 cup unsweetened apple sauce
3 egg whites
2 eggs, whole
¼ cup brewed coffee, cooled
1 ½ tsp vanilla extract
½ cup whole wheat flour
¼ cup unsweetened cocoa powder
½ tsp baking powder
¾ cup raw walnut halves

Preheat oven to 350 F (180 C).

Prepare a 9” square baking dish by oiling and flouring it or lining it with parchment paper.

Melt chocolate in a double broiler. If using two saucepans, keep an eye on the pots so that no water splashes up into the melting chocolate. Also, take your time. If the temperature is too high, you could easily burn the chocolate.

Once melted and smooth, remove the chocolate pot from the heat and set aside.
Beat together sugar, applesauce, eggs, coffee, and vanilla in a mixing bowl.

Add the melted chocolate

Combine the dry ingredients (flour, cocoa, and baking powder) in a separate bowl using a whisk. Add to wet ingredients. Stir well.

Add in walnut halves and stir.


Pour batter into prepared dish and let bake for 30-35 minutes. Cool completely before cutting.


Makes 9 brownies - 215 calories, 7g protein, 30g carbohydrates, 13g fat, 4.5g fiber

I hope you like them.

Saturday, June 4, 2011

Moist Banana Nut Bread

This might end up being a strange post. I’m currently listening to Rod Stewart’s Greatest Hits and about to share a recipe that calls for refined white sugar. I don’t typically bake to “Hot Legs”, nor do I like to promote refined sweeteners, but for some reason Rod is blasting through my laptop speakers, and three-quarters of a cup of Redpath is staring me down. Is there a full moon tonight?...I digress.

I wanted to share with you a classic from my recipe repertoire, my moist and delicious banana nut bread. If I had a dollar for every banana I let sit on my counter top while waiting for it to over-ripen, I might buy a small island and retire. Bananas often get a bad rap because of the amount of sugar in them, but they shouldn't be dismissed completely. Bananas are packed full of potassium and have good amounts of vitamin B6, which wards off fatigue and insomnia.

I love the simplicity of this banana bread and the aroma it emits as it bakes. This recipe is great for making breads or muffins, and there are no special tricks to doubling or halving it. It is full of banana flavor and seems to do well in the mail if you want to ship it to a hungry friend (freeze it once it’s cooled, pack it frozen, then 2-4 day deliver it). Try your best not to dive right in as banana bread is best if eaten twenty-four hours after baking.


The sour cream is what keeps this loaf from drying out, a common problem with fruit breads. Sour cream doesn’t tend to lend any of its own flavors to the bread while baking, so it’s a subtle way to make sure your bread stays deliciously moist.


Moist Banana Nut Bread

½ cup unsalted butter (room temp)
3/4 cup sugar
2 large eggs (room temp)
1 tsp vanilla
3-4 Ripe mashed bananas
1 tsp cinnamon
1 tsp baking soda
½ tsp salt
1 ½ cups flour
½ cup sour cream
½ cup chopped walnuts

Mix butter, eggs, sugar, and vanilla in a mixing bowl until creamy. Add bananas and cinnamon and mix well. Add soda, salt, sour cream and flour, mix well. Add nuts.

Add mix to greased and floured loaf pan. Bake at 350 for about 1 hour or until you can insert a knife into the centre of the loaf and it comes out clean.


I hope you like it.

Saturday, April 16, 2011

Coconut Sugar Chocolate Chip Cookies

I had a fire in my oven today, a big fire. I was preheating it to make these delicious treats when all of the sudden I noticed the light on through the door. Only it wasn’t the light. It was flames. I ended up having to use the toaster oven to bake these 6 at a time. Safety tip: if you ever have a fire in your oven, use large amounts of baking soda to put it out.

Moving on, one treat I miss from time to time is a fresh, soft, gooey chocolate chip cookie. I made them all the time in college for my roommates and for cute boys (more often for the latter), but have since strayed from casually whipping up a tasty batch and popping them in the oven. I’m not a fan of using refined white or brown sugars as most recipes call for, and traditional cookies don’t coincide with my attempts to eat a predominately low GI diet, so I can't justify making them.

That is until now. Ladies and gentlemen, I have discovered coconut sugar.
By “discovered coconut sugar”, I mean happened upon it at the grocery store. I was a tad over-zealous about the find and purchased a large quantity before researching it. Thankfully, once I typed it into my computer search engine, I was more than pleasantly surprised with all it had to offer. It has a GI of less than 35, beating out the higher GI values of honey (55) and cane sugar (68). Also, coconut sugar is high in potassium, magnesium, zinc and iron and is a natural source of vitamin B1, B2, B3, B6 and C.


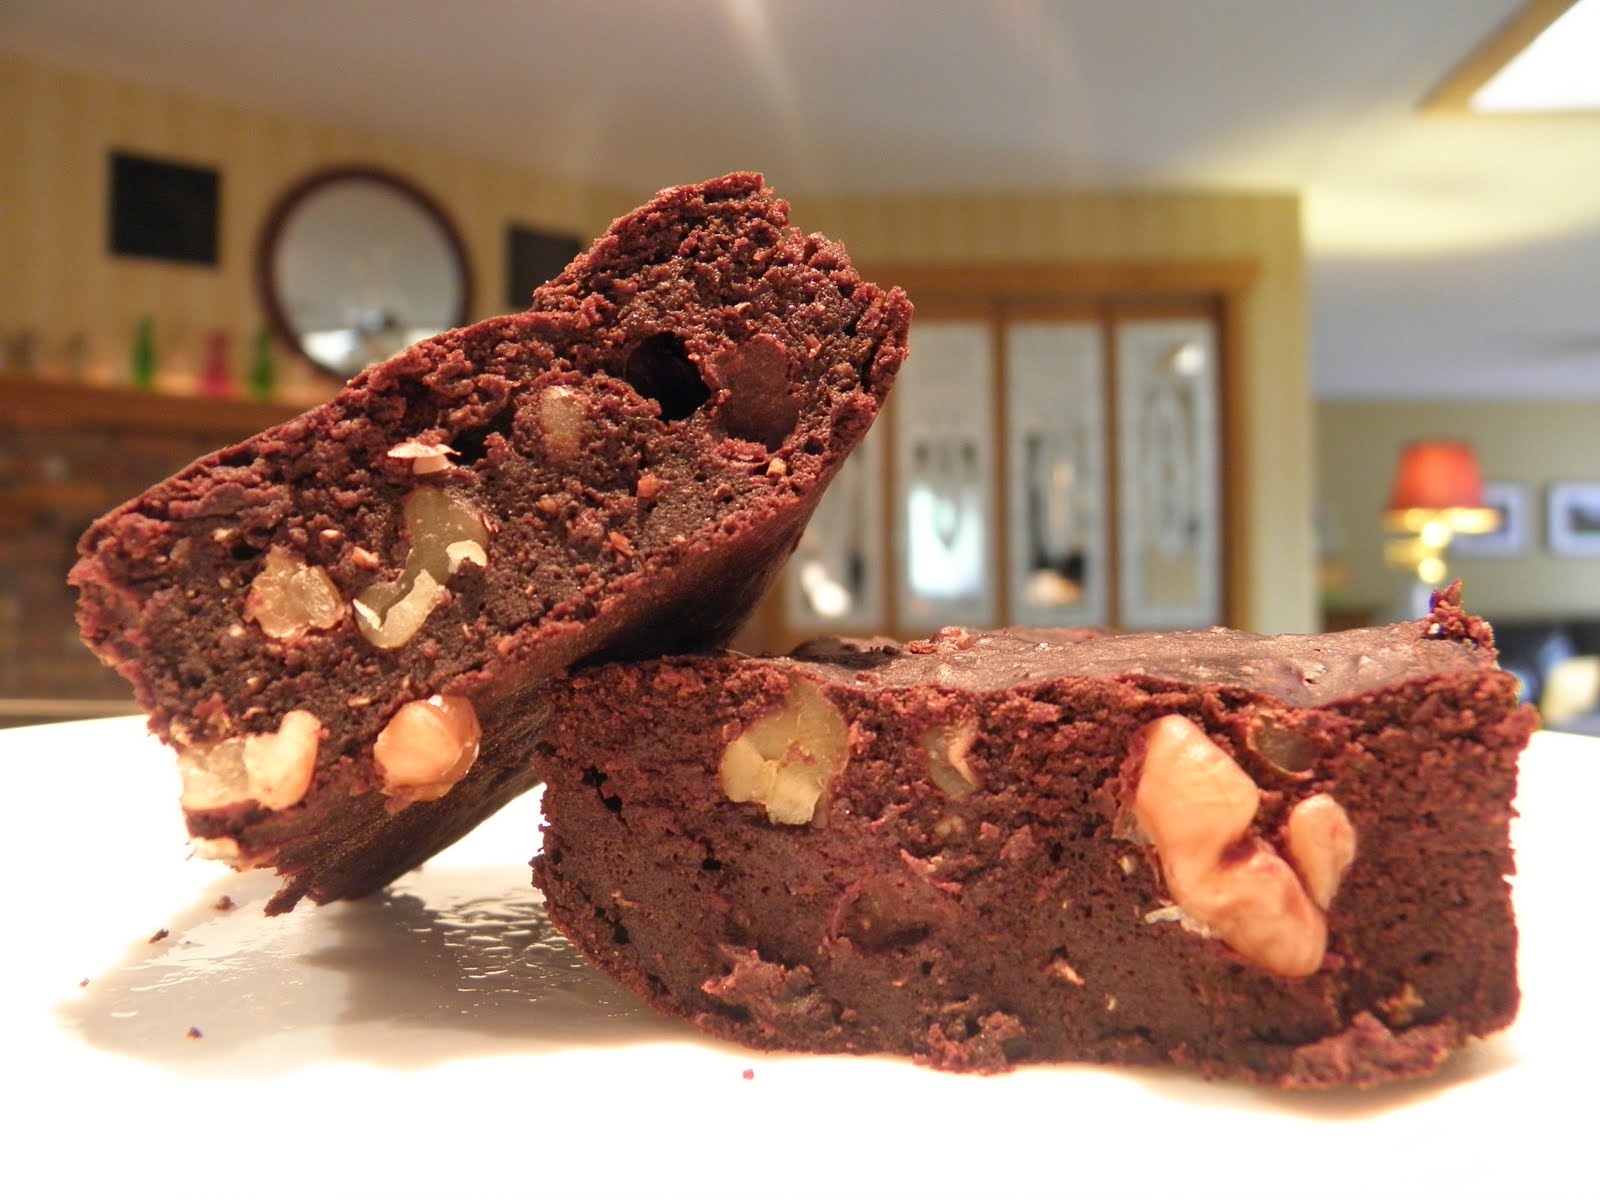
Coconut sugar has a mild sweetness to it. I would describe the flavor as having a creamy brown sugar taste. The cookies turned out incredibly light and fluffy, not heavy like traditional chocolate chip cookies tend to be. If you want to go lower carbohydrates, higher fiber, and even lower GI, substitute some of the all purpose flour with coconut flour*. Really keep a close eye on these while you‘re baking them, as this sugar tends to burn a little faster.

The first thing I had to do was make my own semi-sweet coconut sugar chocolate chips to use in these cookies. This was not as difficult or time consuming as it sounds. I made them the night before so that they had a chance to cool and harden overnight, but they could easily be made an hour before baking and put into the refrigerator for that hour to harden.


Semi-sweet Chocolate Chips

12, 1-oz squares of unsweetened baker’s chocolate
¾ cup coconut sugar
1 tbsp coconut oil

In a double boiler, bring water to a low boil. Add chocolate and sugar and stir until chocolate is melted and sugar is thoroughly incorporated. Add in coconut oil and stir until smooth. Be careful not to let any of the water splash up into your chocolate mix, or it will seize and become unworkable.

At this point I put the melted chocolate mix into a squeeze bottle and dotted parchment paper with the liquid. I let the chips cool and set over night. The finished chips have a semi-gritty texture to them, but once they’re baked in the cookie, they have a smooth, non-gritty finish.


Chocolate Chip Cookies

2 ¼ cups all-purpose flour
1 teaspoon baking soda
1 teaspoon salt
1 cup (2 sticks) butter, softened
1 cup coconut sugar
1 teaspoon vanilla extract
2 large eggs
1 ½ - 2 cups coconut sugar chocolate chips
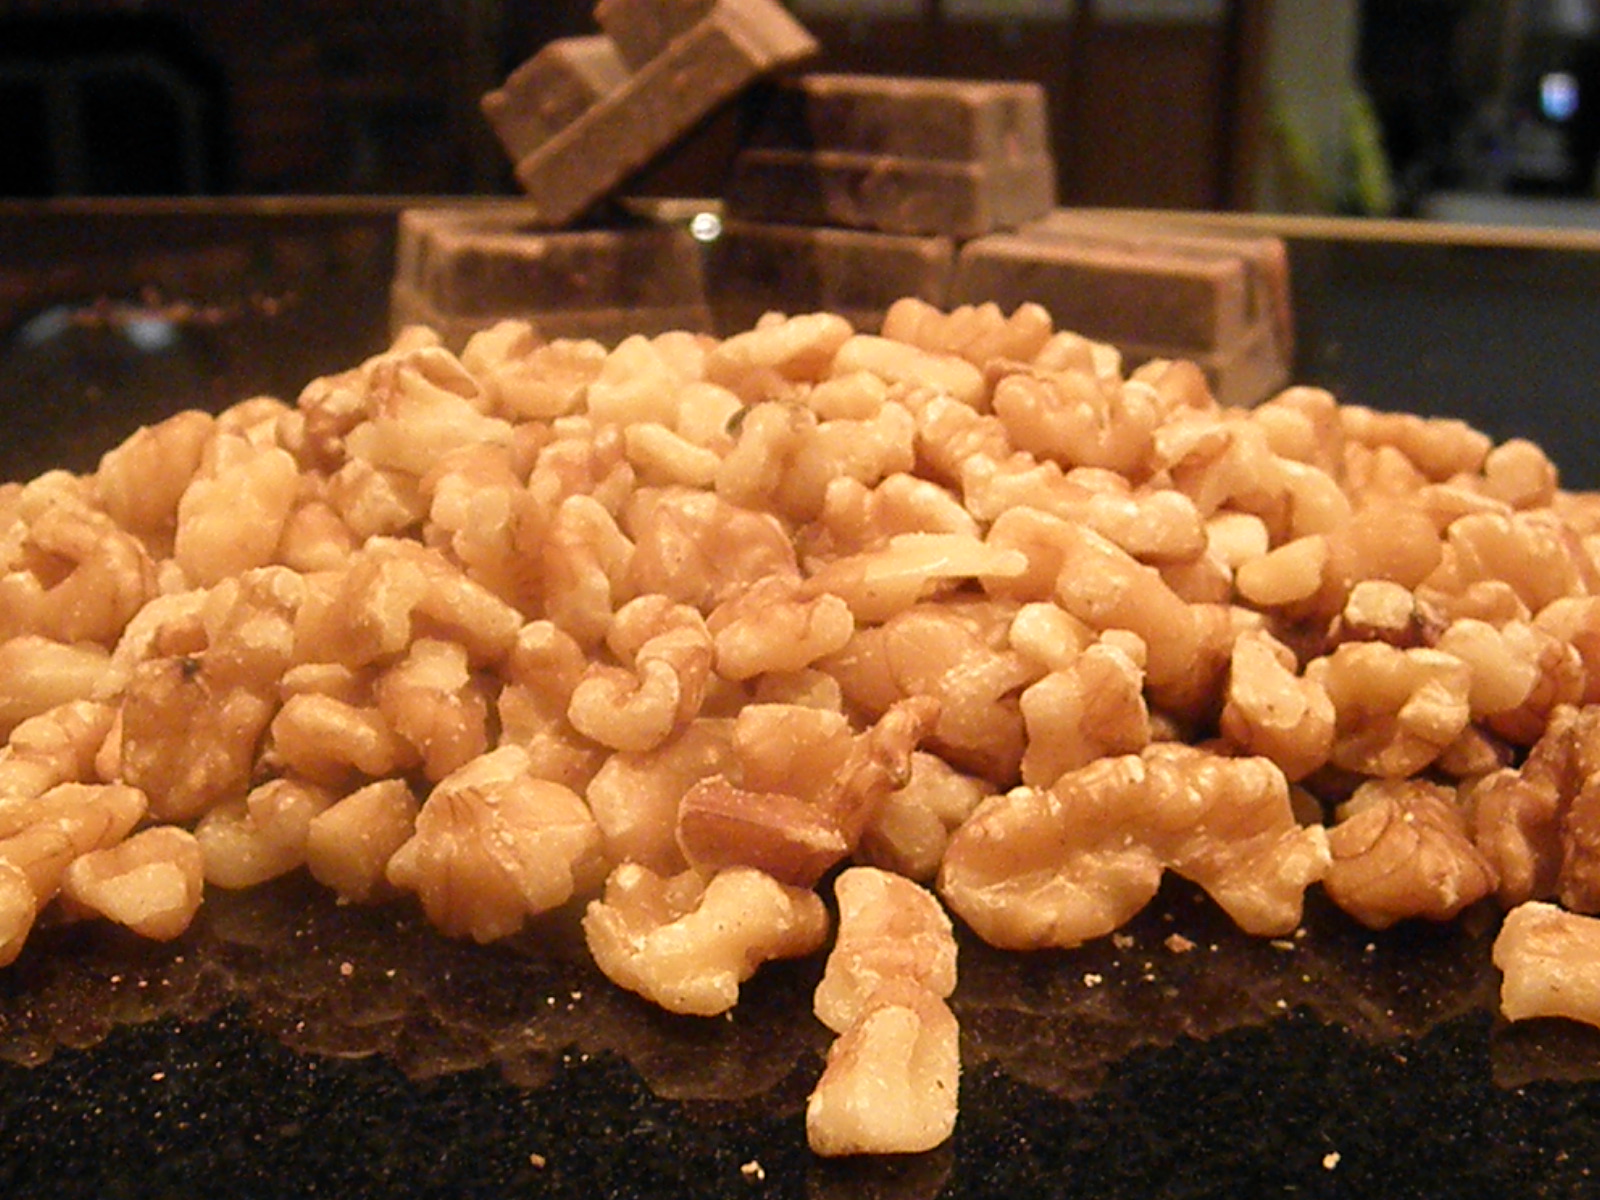
1 cup chopped nuts (optional)

DIRECTIONS

Preheat oven to 375° F.

Combine flour, baking soda and salt in small bowl. Beat butter, coconut sugar, brown sugar and vanilla extract in large mixer bowl until creamy. Add eggs, one at a time, beating well after each addition. Gradually beat in flour mixture. Stir in morsels and nuts.

Drop by rounded tablespoon onto baking sheet lined with parchment paper or onto a baking stone.

Bake for 8 to 10 minutes or until golden brown. Cool on baking sheets for 2 minutes; remove to wire racks to cool completely.


Makes 25-30 cookies. May be stored in refrigerator for up to 1 week or in freezer for up to 8 weeks.

*FOR COCONUT FLOUR SUBSTITUTION: Use 1 ¾ cups of all purpose flour, ½ cup of coconut flour, and ½ cup of additional liquid such as milk, water, or juice.

FOR HIGH ALTITUDE BAKING (5,200 feet): Increase flour to 2 1/2 cups. Add 2 teaspoons water with flour and reduce sugar to 1/2 cup. Bake drop cookies for 8 to 10 minutes.

I hope you like them.

Sunday, April 10, 2011

Larabar Taste-a-like

One of my favorite snacks lately has been the lovely Larabar. I was first introduced to the bar while watching The Biggest Loser. They promoted the bars as healthy, gluten free, whole-food snacks that have no artificial sweeteners or additives. The many-flavored bars range in calorie content from about 180-250, so they make a great mid-day snack.

They truly are delicious, but my overarching concern with the bars is that they are sweetened with dates. Granted, the date brings a wonderful sweetness to the bar that compensates for typical sweetness offered by added sugars or honey. The problem that I have with using dates is that they are extremely high on the Glycemic Index (GI). When considering GI values of food, you should strive to eat foods that fall below a value of 50 (below 40 is even better) to keep your blood sugar levels low and balanced. Dates scale at a whopping 103 on the GI chart. This poses a serious dilemma, especially for anyone hoping for a diabetic-friendly snack bar. Dates are the main ingredient in Larabars, so I wanted to see what I could do differently to lessen the GI impact. I decided to keep a few dates for sweetness, but replace the majority of them with dried figs and prunes. Dried figs score at almost half the GI value of dates, coming in at 65. Prunes are even better, having a GI value of just 29. Both offer high fiber content to any recipe, just as dates do.


For variety during my snacking week I wanted to try a few different flavors: Lemon Coconut and Black Forest (chocolate-cherry flavor). All the bars essentially have the same base (dates/figs/prunes and nuts), so experimenting with different flavors was fun to do.

Lemon Coconut Bars
Makes 8 bars (about 220 calories per bar)

Ingredients
•1 cup almonds
•½ cup dates, pitted
•½ cup black mission figs, pitted
•½ cup prunes
•Zest of 1 lemon
•1 ½ Tbsp lemon juice
•1 cup unsweetened shredded coconut
•Pinch of salt


Directions
1.Line a glass baking 8x8” dish with parchment paper
2.Add ingredients to food processor and process until well mixed (about 2 minutes).


3.Press into baking pan.
4.Chill for at least a couple of hours until firm, then cut into squares or bars.

Black Forest Bars
Makes 6 bars (about 200 calories per bar)

Ingredients
•½ cup dates, pitted
•½ cup black mission figs, pitted
•½ cup prunes
•1 cup almonds
•1 tbsp unsweetened cocoa powder
•1 teaspoon almond extract
•½ teaspoon vanilla
•Pinch of salt

Directions
1.Line a glass baking 8x8” dish with parchment paper
2.Add ingredients to food processor and process until well mixed (about 2 minutes).
3.Press into baking pan.
4.Chill for at least a couple of hours until firm, then cut into squares or bars.


I like to use a pizza cutter to cut these. The bars will keep for up to six days in an air tight container or plastic wrap in the fridge, or several months in the freezer.

I hope you like them.

Saturday, March 26, 2011

Palak Paneer

Indian food. Absolutely delicious. I still remember the day my friend Mike convinced me to go to the Indian buffet in town for the first time. I was skeptical of the cuisine, especially for my tender tummy’s sake, but the visit to the restaurant changed my bias and palate for good. Today, being National Spinach Day (and yes, I did find a calendar that tells me all the food days of the month), I wanted to try my hand at Palak Paneer, or Saag Paneer. Palak Paneer is the beautiful creamy spinach dish that has the bits of cheese throughout. It’s one of my favorite items to get when I visit Indian establishments, so I hope to do it justice in my attempt.

Paneer is very similar to cottage cheese or ricotta, but I wanted to make this dish as authentic as possible, so that meant I had to first make my own Paneer. It’s a basic enough recipe, but it does take a bit of time, so if you’re starving, I recommend substituting the Paneer with cottage cheese or, even better, with a rich ricotta.

PANEER (cheese):

1 litre (4.25 cups) of milk
½ tsp lemon juice

Let the milk come to a boil in a saucepan. In the meantime, add your lemon juice to ½ a cup of warm water. Once the milk begins to boil, pour the lemon juice-water mix into it. Reduce the heat and stir continuously until the milk is completely curdled. Remove the sauce pan from the heat when the separation of the curds and the yellowish whey is complete (I compared the “yellowish whey” here to the liquid you find a block of feta cheese stored in, similar texture and colour).
Next strain the mixture through a clean muslin or cheese cloth. Hold it under running water for about a minute and then press out all the excess water. Hang the bag to drain out all the whey, about an hour. The Paneer can now be pressed into shape and cut into chunks. If you having a hard time shaping your Paneer, let it rest under a heave pot or dish for about 2 more hours before cutting it.


Traditionally, the Paneer is fried in oil for about a minute to give it a crunchy outer skin and enhance its flavour. Fry the Paneers, stirring enough so that it doesn’t stick. Remove from the pan and place onto a plate lined with paper towel, to soak up any excess oil. If you’re wanting to save a few calories, add the Paneer raw.

PALAK (spinach)

2 lbs fresh baby spinach leaves (or frozen chopped spinach, thawed and drained)
1 lb of Paneer cubes (about 28-30 cubes)
1 large onion, finely diced
2 garlic cloves, finely minced
1” piece of ginger, peeled and finely minced
½ tsp turmeric
1 tsp ground cumin powder
1 tsp ground coriander powder
½ tsp garam masala
¼ tsp red chili powder
pinch of nutmeg
salt & pepper, to taste
½ cup cream (you can use light cream or even half and half)
2-3 tbsp oil, olive or vegetable

Half of the recipes I researched called for a tomato element to be added to the Palak, and half did not. I chose to leave out the tomato this time around to see how the final dish compared to ones I have eaten at Indian restaurants.


First you need to blanch the spinach leaves. In a large pot of boiling water, blanch the spinach leaves for just a minute or two. Remove, drain well and run under cold water. This will stop the cooking process and also set their beautiful green color. Using a food processor, pulse the spinach into a smooth paste, adding water if needed (I used the drained whey from the Paneer).

In a skillet on medium high heat, add a tablespoon of oil. When the oil is hot, add the onions and let cook until they are translucent (around 5-6 minutes). Add the ginger and garlic. Stir for a few minutes and add the spices. Let the spices cook for a few minutes then add the pureed spinach. You can add a little water here if needed (again, I used drained Paneer whey). The traditional consistency of this dish is that of thick gravy. Mix well and let cook for 2-3 minutes over medium heat. Now add the Paneer cubes and cream. Stir and let cook for a few more minutes until the Paneer cubes have warmed through.


Serve over Basmati rice. Feeds 4-6 people.

I hope you like it.

Friday, March 25, 2011

Apple-Pecan topped Belgian Waffle

Today marks a very special day in the culinary world. Two special ingredients are being honored simultaneously on this Friday, March 25th. I wanted to recognize both ingredients by creating a dish to celebrate International Waffle Day and National Pecan Day. Not a tall order, when trying to decide how to combine the two ingredients. I was able to highlight both and threw in a few extra ingredients to amplify the creation.

Let’s start with the waffle. In its most basic form, the waffle recipe doesn’t take a lot of consideration; however, I try to limit the amount of sugars in my recipes, so this is where I have to get creative. Since I’m planning to use an apple topping for my waffle, I’m going to use a bit of unsweetened apple sauce instead of sugar to sweeten the waffle batter.

This is the recipe for the batter for a classic Belgian waffle. You should get 2-3 large waffles out of the mix:

1 cup all purpose flour
2 tsp baking powder
Pinch of salt
2 eggs, separated
2 tbsp Unsweetened Apple Sauce
1 cup of milk
¼ cup of melted coconut oil
1 tsp vanilla

In a medium bowl, sift together flour, baking powder and salt.
In a bowl, beat the egg yolks, add milk and melted coconut oil, and vanilla and apple sauce, mix and then add the dry ingredients.
Beat the egg whites to a thick foam and gently fold them into your batter.
Cook your waffles following the instructions of your waffle maker, or if you’re like me, and don’t have a waffle maker, you can pan fry these the same way you would cook a pancake.

Now on to the pecan. In my opinion, the pecan is one of the most delicious nuts you can use for baking or cooking. There is a certain sweetness to a pecan that you can’t find in other nuts. The pecan offers a smooth finish and adds a subtle crunch to your dish. I wanted to pair it with the sweetness of apples and the mild tang of yogurt for the perfect topping for my waffle.


We’ll begin making the topping by baking our apples and pecans in a shallow baking dish:

2 Macintosh Apples
1 tsp cinnamon
½ cup pecan halves, chopped
2 tbsp lemon juice
Peel, core, and slice the apples thinly and in a buttered 9x13” glass dish, toss them with the pecans, lemon juice and cinnamon. Bake at 400 degrees for about 12-15 minutes.

Plate you waffle and top with 1 tbsp unsweetened apple sauce, 1 tbsp plain or vanilla yogurt, and 2 tbsp of your baked apple topping. If you’re feeling like some extra sweetness, add maple syrup to your apple sauce and stir it together before spooning it onto your waffle.

Happy International Waffle Day and National Pecan Day!

Enjoy!

Saturday, March 12, 2011

Coconut Flour Pizza Crust

I’ve recently been obsessed with creating food using coconut flour. I’m a big fan of low Glycemic Index (GI) eating, and coconut flour fits right into that eating style. Coconut flour is low GI, gluten-free, low calorie, low carbohydrate, high protein, and high fiber. Coconut flour is made from finely ground coconut meat that has had most of the moisture and fat removed. The coconut flavor of the flour is mild, which is really nice in baked goods, but not over-powering. The only potential downside to working with the flour is the delicacy of the finished product. The flour acts like a sponge when liquids are added to it, so it can come out very dry if you don’t add the right amount of liquid/eggs to the recipe. Just be careful to treat your finished product gently until you can gauge its durability.

This pizza crust recipe is really tasty. Coconut flour tends to be heavier than other flours, so make sure you spread the dough thinly before baking for a nice, light finish.

Servings: 1 small pizza

3 eggs
1 clove garlic minced
1 cup coconut milk
1/2 cup coconut flour
1/2 teaspoon baking powder
1/4 teaspoon salt
2 tsp Herbes de Provence

Preheat oven to 375 degrees.

Beat eggs in a medium sized bowl, add in milk and garlic, stir.


Add remaining ingredients and beat into the milk mixture. The dough will have a consistency similar to a batter. Add just a bit more coconut flour if it is too runny to spread in the pan.


Spread thinly and evenly on a pizza pan or cookie sheet lined with greased parchment paper.

Bake for 15-20 minutes in oven. Crust is done when fully cooked through and bottom edges begin to brown.


Remove crust from oven and turn over. Carefully peel parchment paper from the bottom of the crust and place crust back on parchment paper with the bottom side up.

Top your pizza with desired toppings. Bake for another 10-15 minutes, depending on the toppings.

Enjoy!